> ## Documentation Index
> Fetch the complete documentation index at: https://quikirr.com/llms.txt
> Use this file to discover all available pages before exploring further.
# Quickstart
> Generate dynamic reports and analyses from customer data in minutes with Quikirr.
***
## 1. Install Quikirr Add-In & Sign Up
Add Quikirr to Excel:
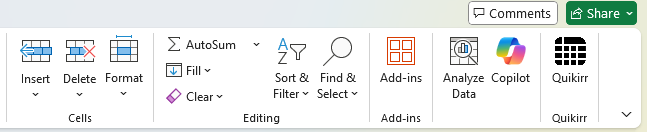
From Excel: `Home › Add‑ins › More Add‑ins` › Search "Quikirr" › **Add**.
Open Quikirr from the Home tab and sign up / log in with your company email.
 Need a license? Contact [sales@quikirr.com](mailto:sales@quikirr.com).
***
## 2. Select Data & Confirm Structure
Need a license? Contact [sales@quikirr.com](mailto:sales@quikirr.com).
***
## 2. Select Data & Confirm Structure
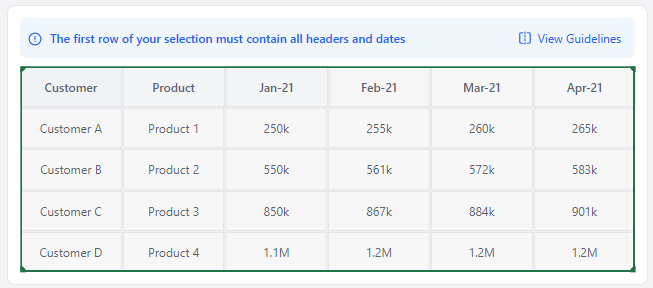 Highlight your customer data cube in Excel from top left to bottom right, then click the 'Confirm Selection' button in the Quikirr pane.
* **Headers**: Row 1 for headers only. Ensure dates are contiguous and on a single row.
* **Required Data**: Must include a Customer ID column and date columns with your revenue metrics.
* **Revenue Metrics**: Ensure consistent metrics in time-based columns (e.g., all ARR or all MRR). Quikirr defaults to ARR but supports other types via Calculation Rules.
* **Data Purity**:
* Avoid merged cells, complex conditional formatting, or PivotTables in the source data.
* Ensure your selection contains only customer data rows, excluding totals, subtotals, or summary rows.
Does each row represent a unique customer? **Yes** or **No**?
* **Yes**: Each row is one customer with their data across time periods. If there are duplicate customer entries, you can clean them up in Customer Consolidation.
* **No**: Rows represent customer-product combinations (e.g., Customer 1 Product A, Customer 1 Product B, Customer 2 Product A). This enables Cross-Sell analysis and we automatically consolidate customers where appropriate for the outputs.
Review Quikirr's auto-detected mappings for:
* Customer ID column
* Date columns interval of your input data (Monthly, Quarterly, Annual)
* (Optional) Product ID column (for Cross-Sell). Enabled when you indicate each row represents a customer-product combination.
* (Optional) Descriptor columns (for Filtering)
Click **Confirm All & Continue** after verifying.
**Large Files**: For large customer files, consider pasting data as values into a clean workbook before running Quikirr. It's not recommended to run Quikirr on worksheets embedded in extensive, multi-tab workbooks.
***
## 3. Configure Analyses & Submit
Highlight your customer data cube in Excel from top left to bottom right, then click the 'Confirm Selection' button in the Quikirr pane.
* **Headers**: Row 1 for headers only. Ensure dates are contiguous and on a single row.
* **Required Data**: Must include a Customer ID column and date columns with your revenue metrics.
* **Revenue Metrics**: Ensure consistent metrics in time-based columns (e.g., all ARR or all MRR). Quikirr defaults to ARR but supports other types via Calculation Rules.
* **Data Purity**:
* Avoid merged cells, complex conditional formatting, or PivotTables in the source data.
* Ensure your selection contains only customer data rows, excluding totals, subtotals, or summary rows.
Does each row represent a unique customer? **Yes** or **No**?
* **Yes**: Each row is one customer with their data across time periods. If there are duplicate customer entries, you can clean them up in Customer Consolidation.
* **No**: Rows represent customer-product combinations (e.g., Customer 1 Product A, Customer 1 Product B, Customer 2 Product A). This enables Cross-Sell analysis and we automatically consolidate customers where appropriate for the outputs.
Review Quikirr's auto-detected mappings for:
* Customer ID column
* Date columns interval of your input data (Monthly, Quarterly, Annual)
* (Optional) Product ID column (for Cross-Sell). Enabled when you indicate each row represents a customer-product combination.
* (Optional) Descriptor columns (for Filtering)
Click **Confirm All & Continue** after verifying.
**Large Files**: For large customer files, consider pasting data as values into a clean workbook before running Quikirr. It's not recommended to run Quikirr on worksheets embedded in extensive, multi-tab workbooks.
***
## 3. Configure Analyses & Submit
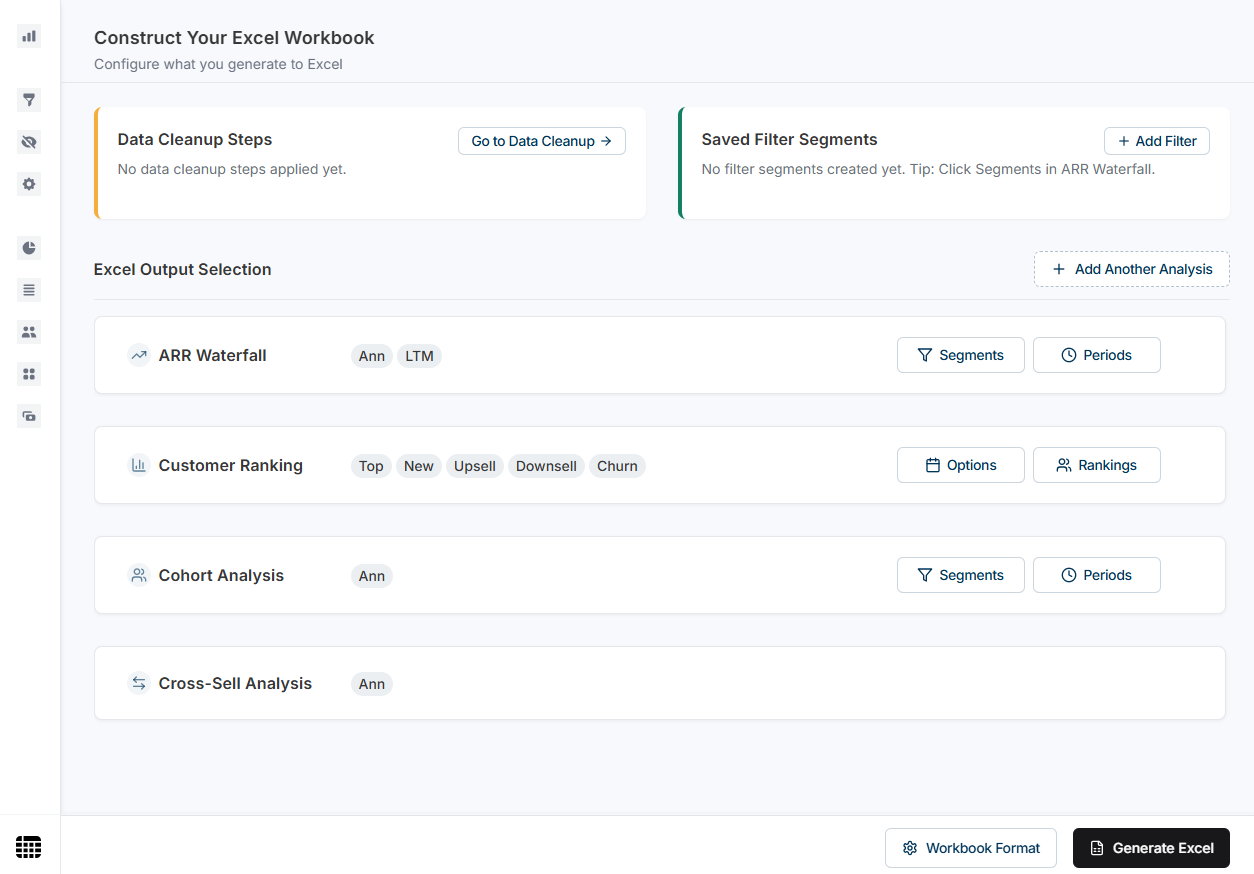 Configure which analyses you want to generate to Excel along with various settings:
* **Clean Data**: Use Data Clean‑Up for duplicates, negatives, etc.
* **Filter**: Apply saved segment filters via the Filter Center.
* **Analyses**: Select reports like:
* Waterfalls
* Cohorts
* Rankings
* **Workbook Format**: Set units, fiscal year end, or enable Big Data mode for better performance on large data cubes.
Click **Generate Excel** when ready.
***
## 4. Generate Workbook & Review
Quikirr will generate the workbook in a few seconds to a few minutes, depending on the size of your underlying data cube and how many output worksheets you've selected.
Configure which analyses you want to generate to Excel along with various settings:
* **Clean Data**: Use Data Clean‑Up for duplicates, negatives, etc.
* **Filter**: Apply saved segment filters via the Filter Center.
* **Analyses**: Select reports like:
* Waterfalls
* Cohorts
* Rankings
* **Workbook Format**: Set units, fiscal year end, or enable Big Data mode for better performance on large data cubes.
Click **Generate Excel** when ready.
***
## 4. Generate Workbook & Review
Quikirr will generate the workbook in a few seconds to a few minutes, depending on the size of your underlying data cube and how many output worksheets you've selected.
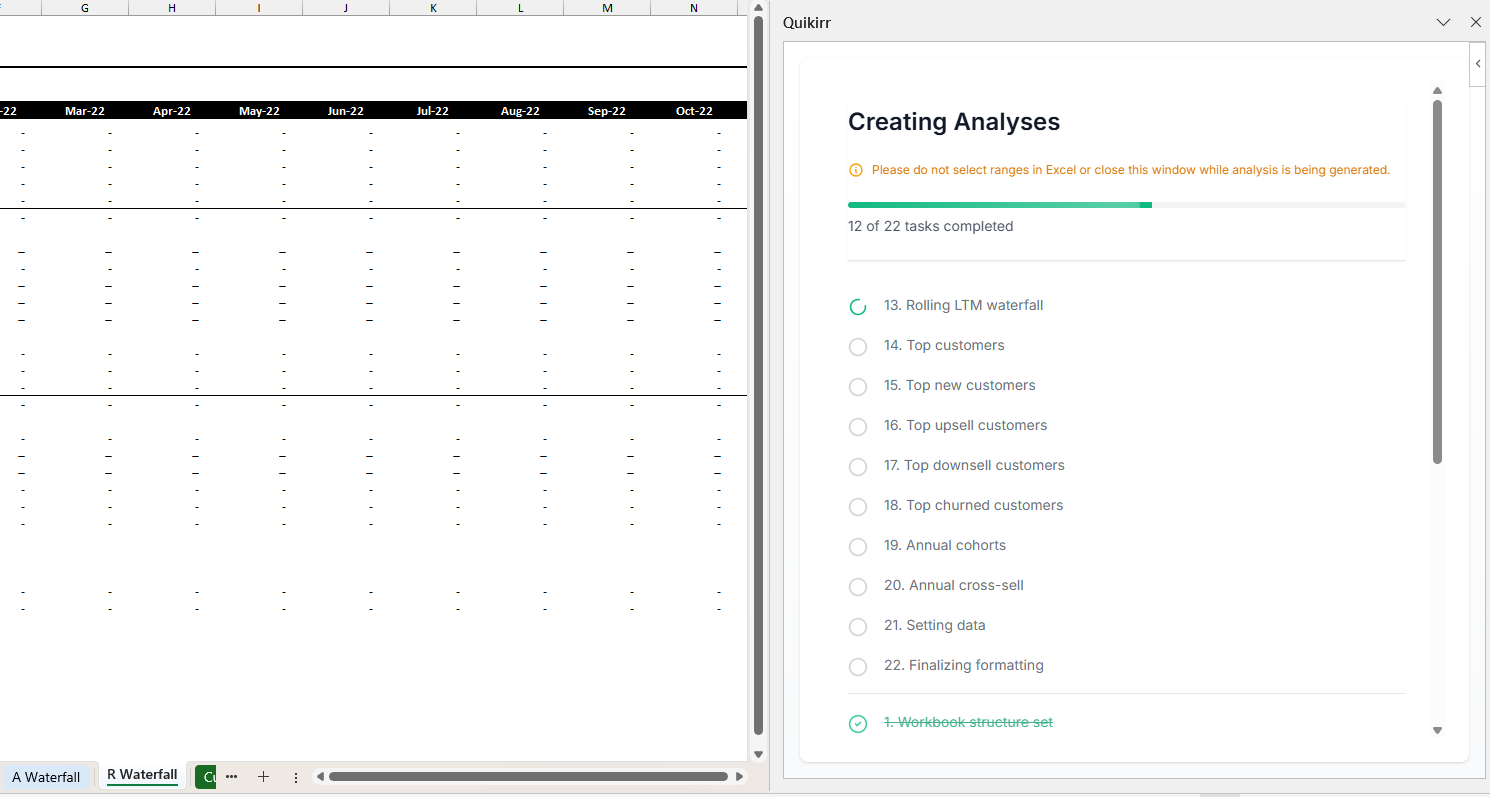 Avoid interacting with other Excel workbooks or selecting cells during generation.
**Done!** You now have a dynamic, professional-grade Excel workbook.
**Next Steps:**
* Explore the generated sheets.
* Check feature pages (e.g., Waterfalls) for details.
* If you need to make changes, you can re-run Quikirr by copying the original tab into a new workbook.
Avoid interacting with other Excel workbooks or selecting cells during generation.
**Done!** You now have a dynamic, professional-grade Excel workbook.
**Next Steps:**
* Explore the generated sheets.
* Check feature pages (e.g., Waterfalls) for details.
* If you need to make changes, you can re-run Quikirr by copying the original tab into a new workbook.